How To Increase Maximum File Upload Size On The Server
On most hosting providers maximum file upload size is set between 2MB and 25MB, so when trying to upload files larger then this you might encounter some issues.
There are several ways to resolve this issue. Not all of them might work on all hosting providers, but we've tried to list them in the order of most likely to work everywhere.
Note that this article only applies when uploading and storing files locally. If you are using s3 or another cloud provider to store files, enable direct upload option from admin > settings > uploading page to upload files directly from user's browser to cloud provider, without touching your server.
1. Enable chunked uploading
You can enable chunked uploading from "admin -> settings -> uploading" page and reduce "chunk size" option on the same page until you are able to upload the file. This will:
Split the file into chunks of specified size.
Upload those chunks simultaneously.
Reassemble the chunks into the original file after all chunks have been uploaded.
Chunked uploading will also allow uploads to be resumed if uploading for the same file failed previously for some reason and it might increase upload speed as different file chunks can be uploaded simultaneously.
2. Update .htaccess file
If your web server is using Apache and PHP is set as an Apache module, then you can add a few lines of code in the .htaccess file to increase the max upload size.
Connect to your server via FTP or via built-in cpanel file manager and open "public/.htaccess" file.
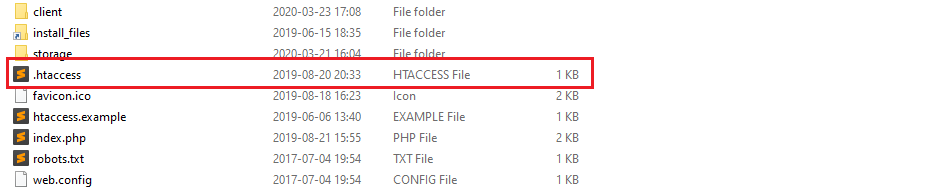
Add the following lines at the end of the file:
php_value upload_max_filesize 128M
php_value post_max_size 128M
php_value memory_limit 256M
php_value max_execution_time 300
php_value max_input_time 300
This will define the max upload size in Megabytes. Replace the numbers as per your requirement. The max execution time and max input time are in seconds. The execution time defines the limit of time that can be spent on a single request, so if uploading a large file takes 30 seconds and max execution time is set to 20 seconds, you will receive an error when upload progress is around 80%.
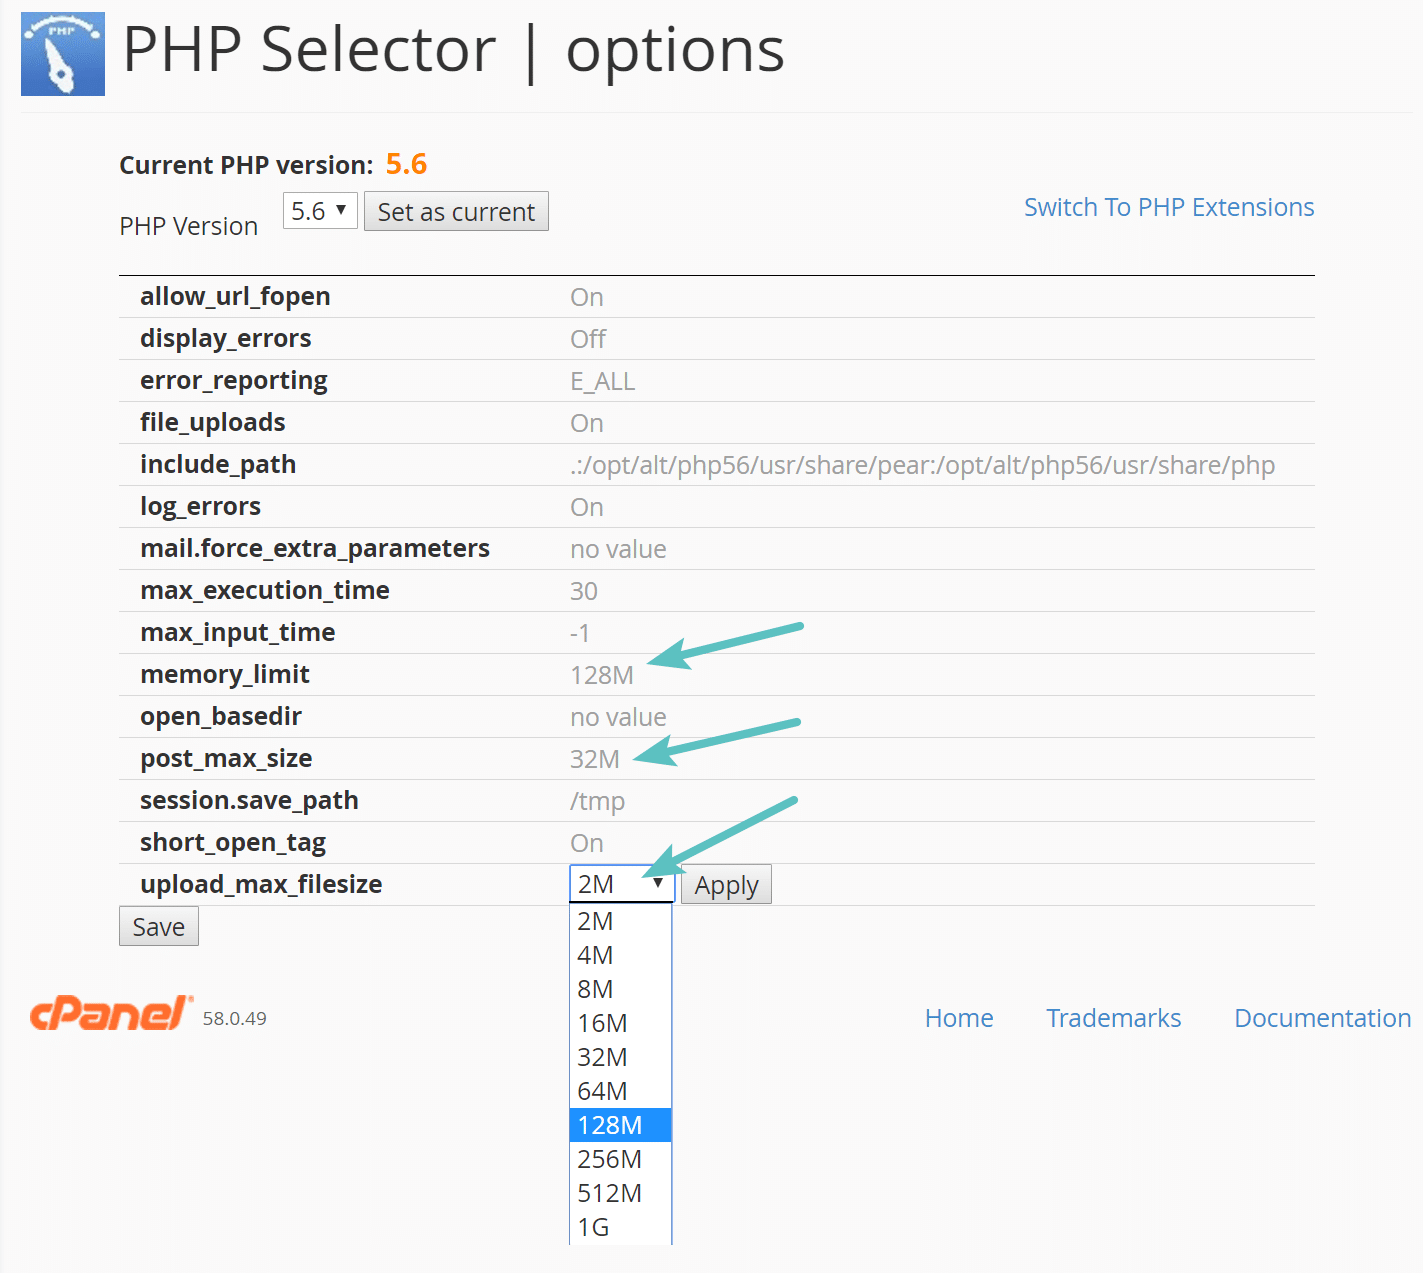
3. Change PHP Options in cPanel (or another control panel)
If you are running on a host that uses cPanel or similar control panel, you can usually change php options from your cpanel site. The interface in your hosting provider's cpanel might look different, but the process should be similar.
Under Software click on "Select PHP Version."
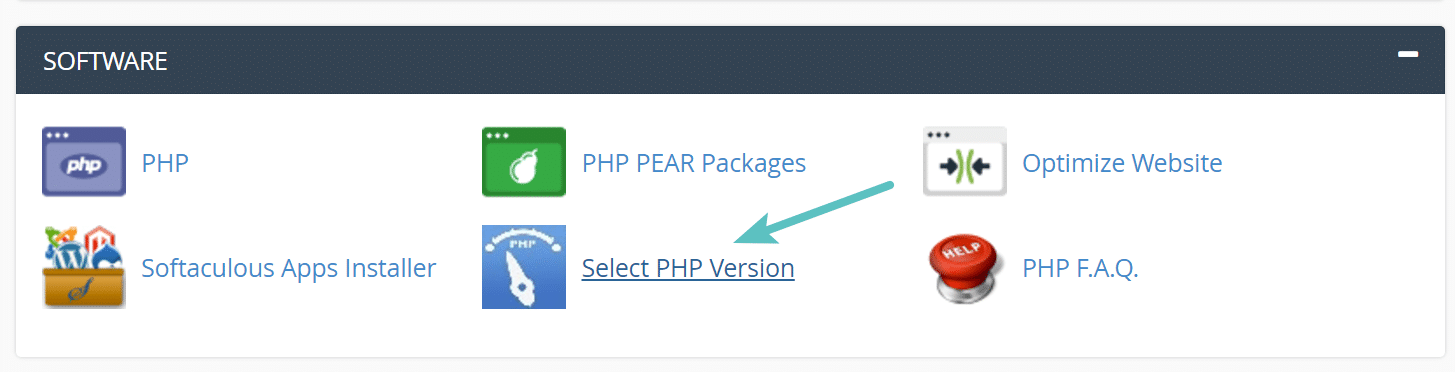
Click on "Switch to PHP Options."
You can then click on each property and change its value. Then click on "Save".
4. Configuring php.ini File
This method is most suitable when using VPS hosting as shared hosting providers generally don’t allow editing the php.ini file. If you’re running on shared hosting, make sure to contact your hosting support team and clarify whether or not you can modify the php.ini file.
Here’s how to increase the maximum file upload size by configuring php.ini file:
Access the root directory where script is installed (usually public_html) via an FTP client, File Manager, or SSH (if it’s supported), then open the php.ini file. If you cannot find the file, create one under the same name and filetype in the root directory.
Add the following code to the php.ini file and save the changes:
upload_max_filesize = 128M
post_max_size = 128M
memory_limit = 256M
max_execution_time = 300
max_input_time = 300
If you do not want to edit the files yourself then you can always contact your hosting provider to do it for you.